Start HuMo-genealogy
Start HuMo-genealogy and first settings
This is the second step to install HuMo-genealogy. If the HuMo-genealogy files are copied to the server, you can open your web browser (such as: Edge, Chrome or Firefox), and open HuMo-genealogy.
Normally you need these links:
If you are using a hosting provider: yourwebsite.com/humo-gen/admin
If your are using Xampp at a local pc: localhost/humo-gen/admin or: localhost:8080/humo-gen/admin
You will see this screen:
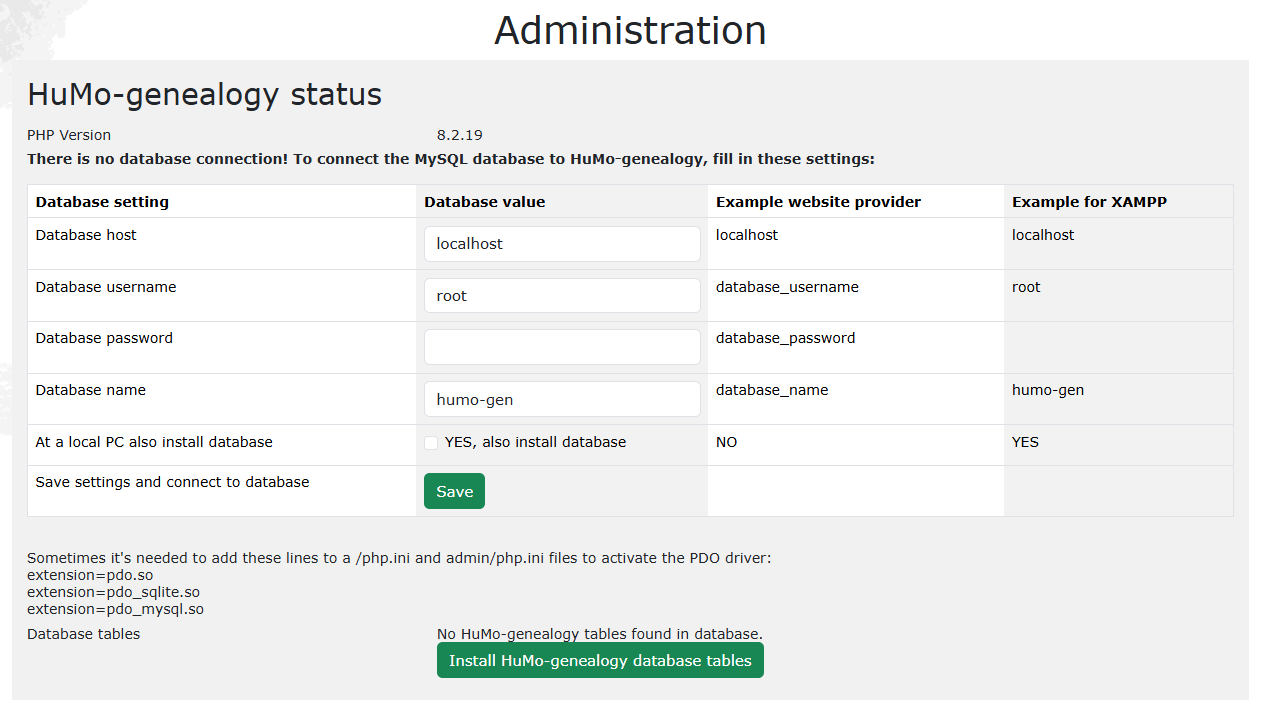
Add these settings: Database host, Database username, Database password, Database name. (Examples for a webhost environment and PC setup are given next to the entry fields).
The DATABASE_HOST, USERNAME, PASSWORD and DATABASE-NAME will be given by your provider or if you have access to your site’s control panel, you may have created them yourself using Mysql tools of the control panel.
With some American hosting providers (such as Bluehost.com) the values for DATABASE_USERNAME and DATABASE_NAME have to be preceded by the username of your control panel. For example if the values of these two entries above are: “myusername” and “mydatabase” and the username of your control panel is “mycontrol”, then the values that have to be entered are: “mycontrol_myusername” and “mycontrol_mydatabase”.
(ONLY when installing at a local PC use the select box to install a database. Don’t use this when installing with a hosting provider).
Click “Save”. If the database connection is successful, you will see this screen:
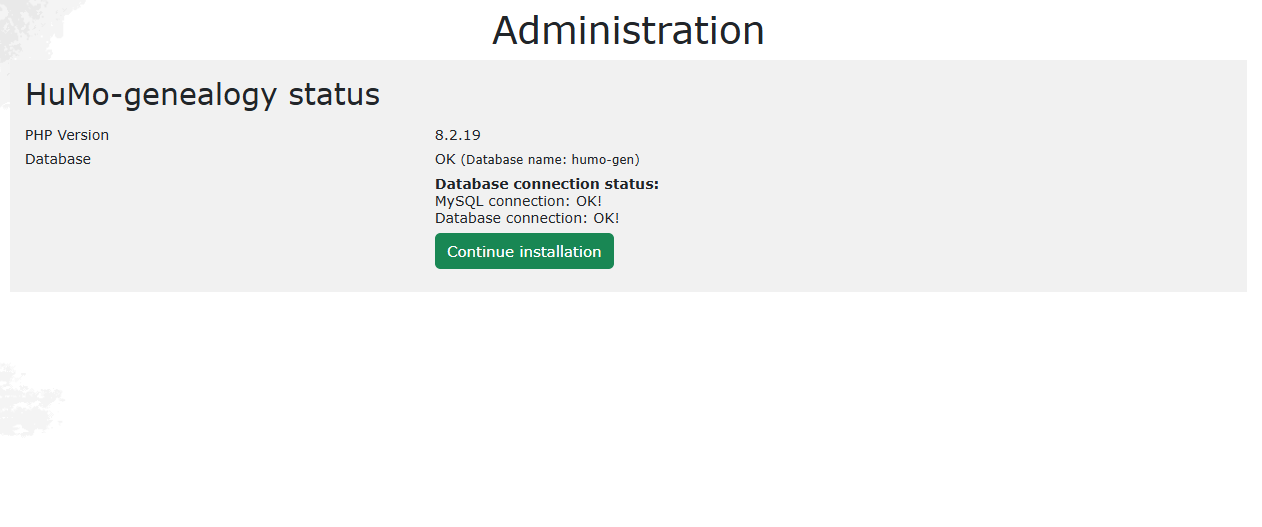
Installation of database tables
You will see this screen:
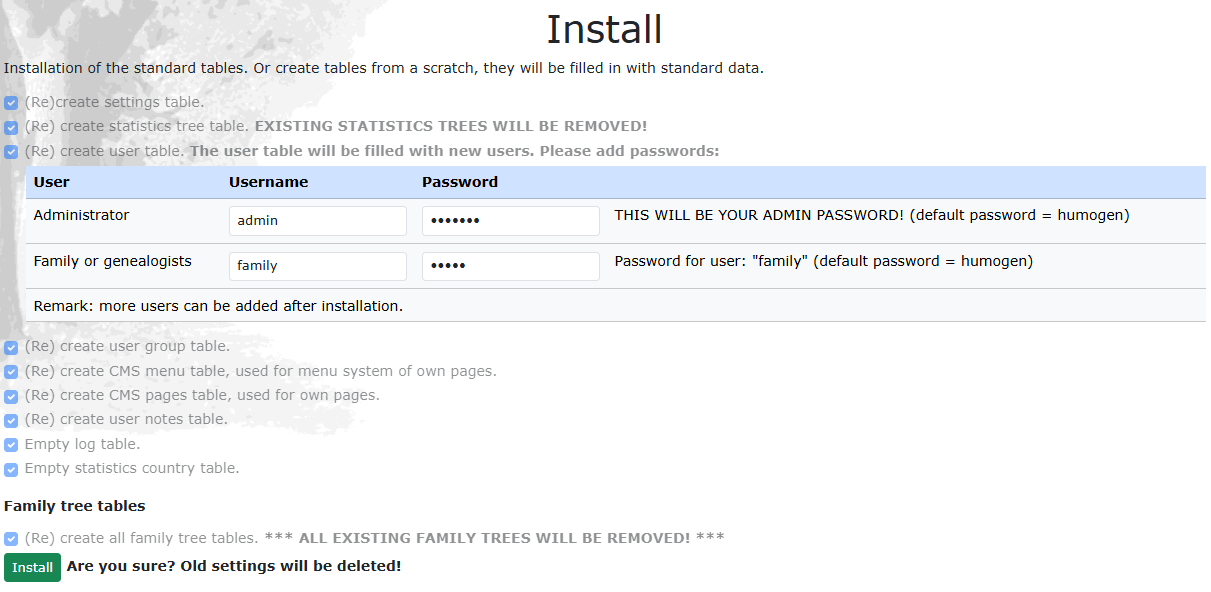
Add your administrator username and password in this screen. If you don’t do this, the username will be “admin” and password will be “humogen”.
It’s possible to change the username and password later.
Now click “install” and “yes”.
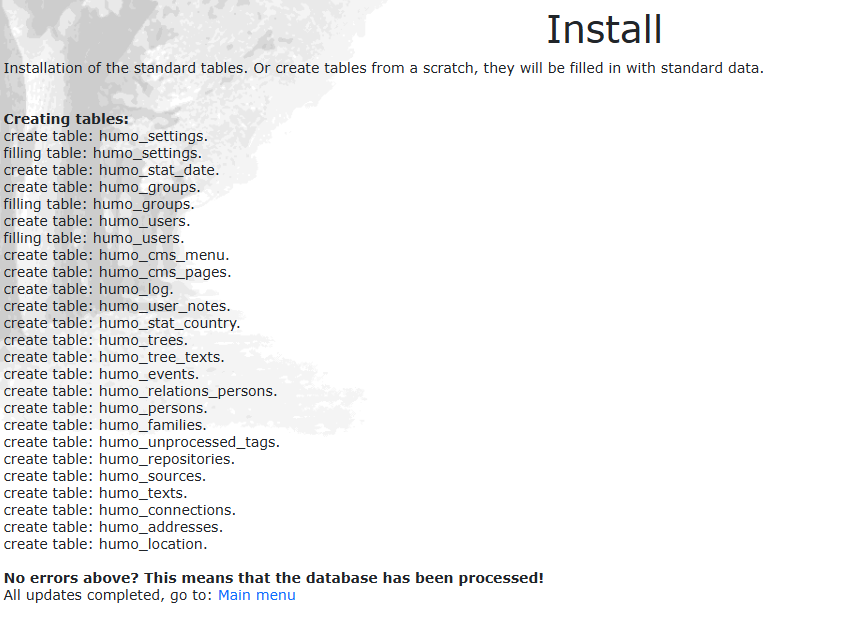
Click “Main menu”. You have to log in using your administrator username and password.
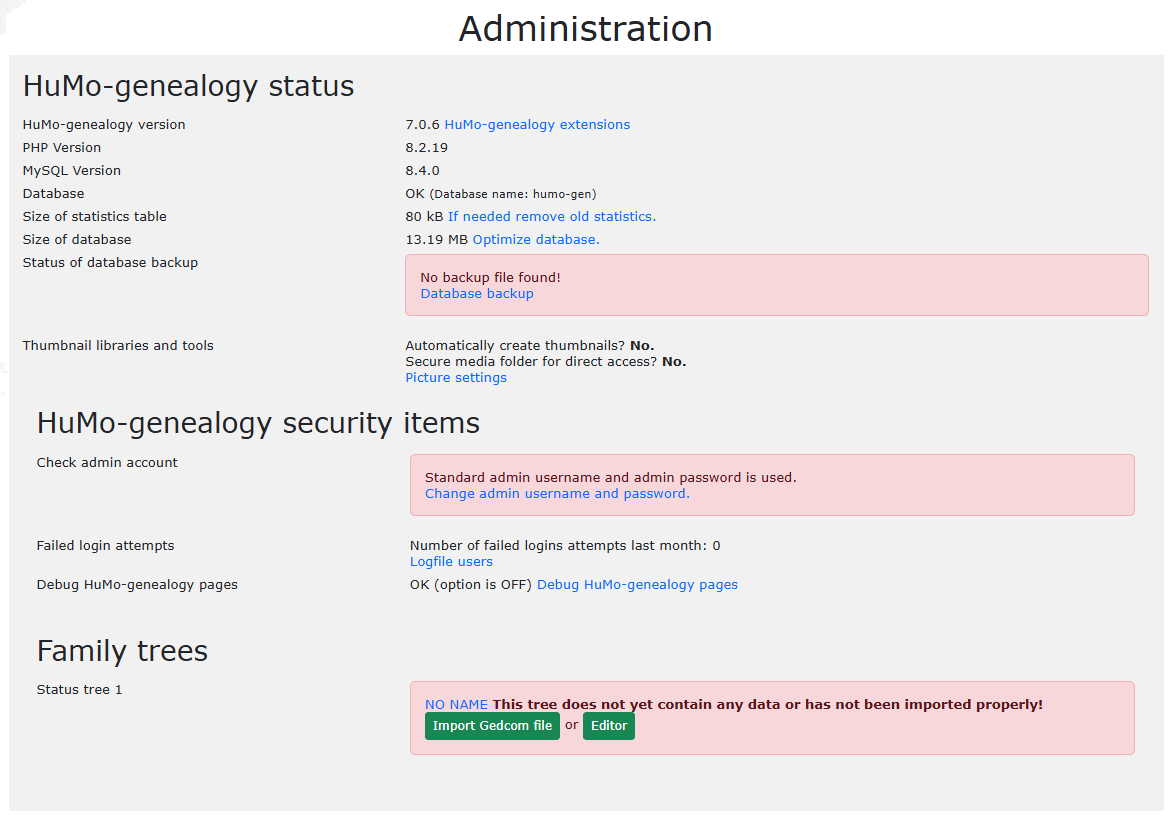
Now it’s possible to start your family tree by entering data, or import a GEDCOM file from your genealogical program.
On the lower red box press the “import GEDCOM file” button. On the next screen hit “Browse” and find the GEDCOM file you want to use for your site (you can add more later on if needed). Choose it. You will be told the file was “uploaded” successfully.
Hit “step 2” - the tables are filled in.
Hit “Step 3” - The GEDCOM file will be read in with a progress bar.
Hit “Step 4”. You’re ready. You can either use the “index.php” link that’s waiting for you there, or enter the full URL localhost/humo-gen in your browser. You will see the default front page of your new website as it would look on the web.
You can go back to the admin page localhost/humo-gen/admin to enter general details for your site under “Settings”, import additional Gedcoms under “Family Tree” or enter descriptions, links etc. for each tree in multiple languages.
To update a GEDCOM file, you only have to do this:
-
Open the administration screen in your browser:
-
Click on “Family Trees”
-
Select “Family Tree Data next to the tree you want to update.
-
Hit “Import GEDCOM” and choose your updated GEDCOM file.
Settings administration menu
TIPS:
-
Administration > Control > Settings: Check the default settings, if needed, fill in the name of your website, e-mail address etc.
-
Administration > Control > Settings: Here you can also set the default language for display and for the administration menu (each separately).
-
Family trees> Family trees: Here you find the settings for each tree, a.o. the name of the tree, the path to the pictures, etc.
-
Users > Users : Here you can create new users, and connect the user to a user group.
-
Users > Groups : Here you can change several settings for EACH user group, a.o. privacy, showing pictures and texts.